Making an extension spring at home can be a rewarding and educational experience. As an extension spring supplier, I’ve seen firsthand the importance of these components in various applications, from industrial machinery to everyday household items. In this blog post, I’ll share my knowledge and expertise on how you can create your own extension springs at home. Extension Spring
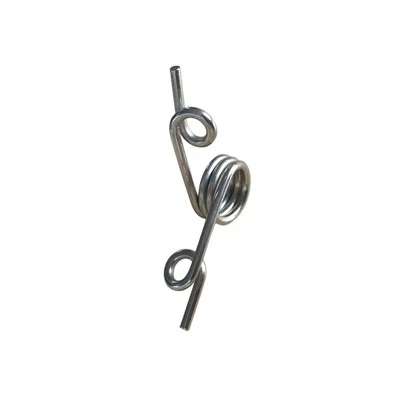
Understanding Extension Springs
Before we dive into the process of making an extension spring, it’s essential to understand what an extension spring is and how it works. Extension springs are helical springs that resist stretching. They are typically made from round wire and have hooks or loops at each end to attach to other components. When a force is applied to stretch the spring, it stores mechanical energy, which is then released when the force is removed, causing the spring to return to its original length.
Materials and Tools Needed
To make an extension spring at home, you’ll need the following materials and tools:
Materials
- Spring Wire: The most common material for extension springs is steel, but you can also use other materials like stainless steel, music wire, or phosphor bronze, depending on your application. Make sure to choose the appropriate wire diameter and material based on the desired strength and flexibility of your spring.
- Hooks or Loops: You’ll need to create hooks or loops at each end of the spring to attach it to other components. You can use the same wire as the spring or a different material, such as a metal rod or a piece of wire with a larger diameter.
Tools
- Wire Cutter: A good quality wire cutter is essential for cutting the spring wire to the desired length. Make sure the cutter is sharp and can handle the diameter of the wire you’re using.
- Mandrel: A mandrel is a cylindrical rod around which you’ll coil the spring wire. You can use a solid rod or a piece of tubing with the appropriate diameter. The diameter of the mandrel will determine the inner diameter of the spring.
- Pliers: Pliers are useful for bending the wire and creating the hooks or loops at the ends of the spring. You’ll need a pair of round-nose pliers for creating tight loops and a pair of long-nose pliers for making larger hooks.
- Bench Vise: A bench vise is a must-have tool for holding the mandrel and the wire securely while you’re coiling the spring. Make sure the vise is firmly attached to a stable workbench.
- Hammer and Anvil: You may need a hammer and anvil to straighten the wire before coiling it and to shape the hooks or loops at the ends of the spring.
Step-by-Step Guide to Making an Extension Spring
Now that you have all the necessary materials and tools, let’s walk through the process of making an extension spring at home:
Step 1: Measure and Cut the Wire
Determine the length of wire you need based on the number of coils and the desired outer diameter of the spring. You can use the following formula to calculate the approximate length of wire required:
[L = \pi \times D \times N + 2 \times L_h]
Where:
- (L) is the length of the wire
- (D) is the outer diameter of the spring
- (N) is the number of coils
- (L_h) is the length of the hooks or loops at each end
Use the wire cutter to cut the wire to the desired length. Make sure the ends of the wire are clean and straight.
Step 2: Prepare the Mandrel
Choose a mandrel with a diameter slightly smaller than the desired inner diameter of the spring. This will allow for some expansion of the wire as it’s coiled. Insert the mandrel into the bench vise and tighten it securely.
Step 3: Start Coiling the Wire
Hold the end of the wire against the mandrel and start coiling it around the mandrel in a clockwise direction. Use your fingers or the pliers to guide the wire and keep it tight against the mandrel. Make sure the coils are evenly spaced and close together.
As you coil the wire, keep adding tension to it to ensure that the coils are tightly wound. You can use the pliers to apply a gentle pulling force on the wire as you’re coiling it.
Step 4: Determine the Number of Coils
The number of coils in an extension spring will depend on the desired spring rate and the amount of stretch you need. The more coils the spring has, the more flexible it will be. You can use the following formula to calculate the approximate number of coils required:
[N = \frac{F}{k \times \Delta x}]
Where:
- (N) is the number of coils
- (F) is the force applied to the spring
- (k) is the spring rate
- (\Delta x) is the amount of stretch
Once you’ve reached the desired number of coils, stop coiling the wire.
Step 5: Create the Hooks or Loops
Use the round-nose pliers to create a tight loop at one end of the spring. Start by bending the wire around the tip of the pliers and then twisting it to form a loop. Make sure the loop is small enough to fit the component you’ll be attaching the spring to.
Repeat the process at the other end of the spring to create the second loop. You can also create hooks instead of loops by bending the wire at a 90-degree angle and then forming a small loop at the end.
Step 6: Remove the Spring from the Mandrel
Once you’ve created the hooks or loops, carefully remove the spring from the mandrel. You may need to use the pliers to gently pry the spring off the mandrel if it’s tightly wound.
Step 7: Test the Spring
After removing the spring from the mandrel, test it to make sure it has the desired spring rate and stretch. Hang a known weight from one end of the spring and measure the amount of stretch. Compare the measured stretch to the calculated stretch based on the spring rate and the number of coils. If the spring doesn’t meet your requirements, you may need to adjust the number of coils or the wire diameter and try again.
Tips and Tricks
- Use a Lubricant: Applying a small amount of lubricant, such as oil or wax, to the wire before coiling it can make the process easier and prevent the wire from sticking to the mandrel.
- Keep the Wire Tight: Maintaining constant tension on the wire while coiling it is crucial for creating a spring with evenly spaced coils. Use your fingers or the pliers to apply a gentle pulling force on the wire as you’re coiling it.
- Practice Makes Perfect: Making an extension spring at home takes practice. Don’t be discouraged if your first few attempts don’t turn out perfectly. Keep experimenting with different wire diameters, mandrel sizes, and coiling techniques until you achieve the desired results.
Safety Precautions
- Wear Safety Glasses: When cutting and coiling the wire, small pieces of metal may fly off, which can be dangerous to your eyes. Always wear safety glasses to protect your eyes.
- Use Caution with Tools: The tools used to make an extension spring, such as wire cutters, pliers, and hammers, can be sharp and dangerous. Use them with caution and follow the manufacturer’s instructions.
- Avoid Overstretching the Spring: Overstretching the spring can cause it to lose its elasticity and become useless. Make sure to test the spring with a known weight and avoid applying too much force.
Conclusion

Making an extension spring at home can be a fun and rewarding project. By following the steps outlined in this blog post and using the right materials and tools, you can create your own extension springs for various applications. Whether you’re a DIY enthusiast or a professional mechanic, having the skills to make your own springs can save you time and money.
Torsion Spring As an extension spring supplier, I’m always here to help you with any questions or concerns you may have about extension springs. If you’re interested in purchasing high-quality extension springs or need more information about our products and services, please don’t hesitate to contact me for a procurement discussion. Together, we can find the perfect solution for your specific needs.
References
- "Mechanical Springs Handbook" by Design News
- "Spring Design and Applications" by Society of Automotive Engineers (SAE)
Shengzhou Deyuxiang Hardware Accessories Co., Ltd.
We are one of the most professional extension spring manufacturers and suppliers in China, also support customized service. With abundant experience, we warmly welcome you to buy high quality extension spring made in China here and get pricelist from our factory. For price consultation, contact us.
Address: No. 38, Caosheng Road, Caoqiao Street, Pinghu City, Jiaxing City, Zhejiang Province
E-mail: 877286126@qq.com
WebSite: https://www.dyx-spring.com/
